
Download the Dori Pole Installation Guide
Use of the DP Ground Stakes – Temporary Pole Installation:
 1. When pounding the Ground Stakes into the earth it is best to protect the top with a wood block or similar to absorb some of the force to prevent the top of the metal stake from disfiguring.
2. Stake should be driven deep enough so the top of the 90-degree metal angle is flush with the ground.
3. Next, for the taller 19’ Pole, slip the 1″ aluminum bushing tube over the exposed Ground Stake. This tube insures a straight, vertical installation and prevents the top of the Ground Stake from rubbing against the inside of the Dori Pole and eventually damaging it. The 13.5’ Mid-Rise does not need this bushing tube and the 12’ JR Ground Sleeve does not have this tube.
4. Raise the Dori Pole vertical and slip over the Ground Stake. For the JR, slip into the Stake.
**Note: The Ground Stake silver Bushing is only used for 19ft 3-piece Dori poles, it is not used with the 13.5ft Dori Poles.
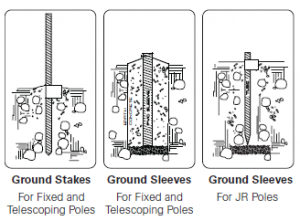
Figure A: Ground Stake for temporary installation of 13.5’, and 19’ poles
Figure B: Ground Sleeve for permanent installation of 13.5’, and 19’ poles
Figure C: Ground Sleeve Jr. for temporary and permanent installation of 8’ JR poles only.
 Use of the DP Ground Sleeves – Permanent Pole Installation:
The DP Ground Sleeves are meant to be encased in concrete in a hole. The taller Dori Poles use a 2″ PVC pipe especially configured for this. The DP Junior uses the Ground Stake JR, noted above, for this purpose and would be encased in concrete.
1. The hole for the taller poles should be 6″ to 8″ in diameter and deep enough for Sleeve to protrude about 1/2″ above the ground surface and for the Junior 6″ diameter is sufficient. Provide gravel or stone drainage (VERY important) under the Sleeve, as shown on illustration.
2. Insert the Ground Sleeve and backfill with quick-setting post hole concrete, with the top surface sloping down from Sleeve for drainage.
3. The taller Dori Pole, 19’ , comes with 2- DP O-Rings to act as bushings for insertion of the pole into the Ground Sleeves.
The Dori Pole Wheel Stand for Mounting Next to Vehicles (For 13.5’, 19’ and 22’ poles only):
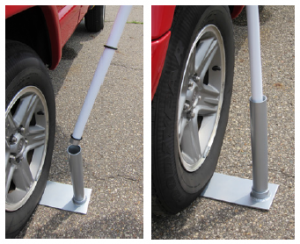
Position DP Wheel Stand under tire before inserting the Dori Pole. Be sure to slip the two DP O-Rings onto the bottom of the pole, as shown in Figure D, before inserting pole into Wheel Stand.
1. Install the supplied O-Rings at base of pole just above the collar.
2. Twist the tube into the base flange until tightened.
3. Ease the car tire over the intended place on the base. Place the Dori Pole into the tube.
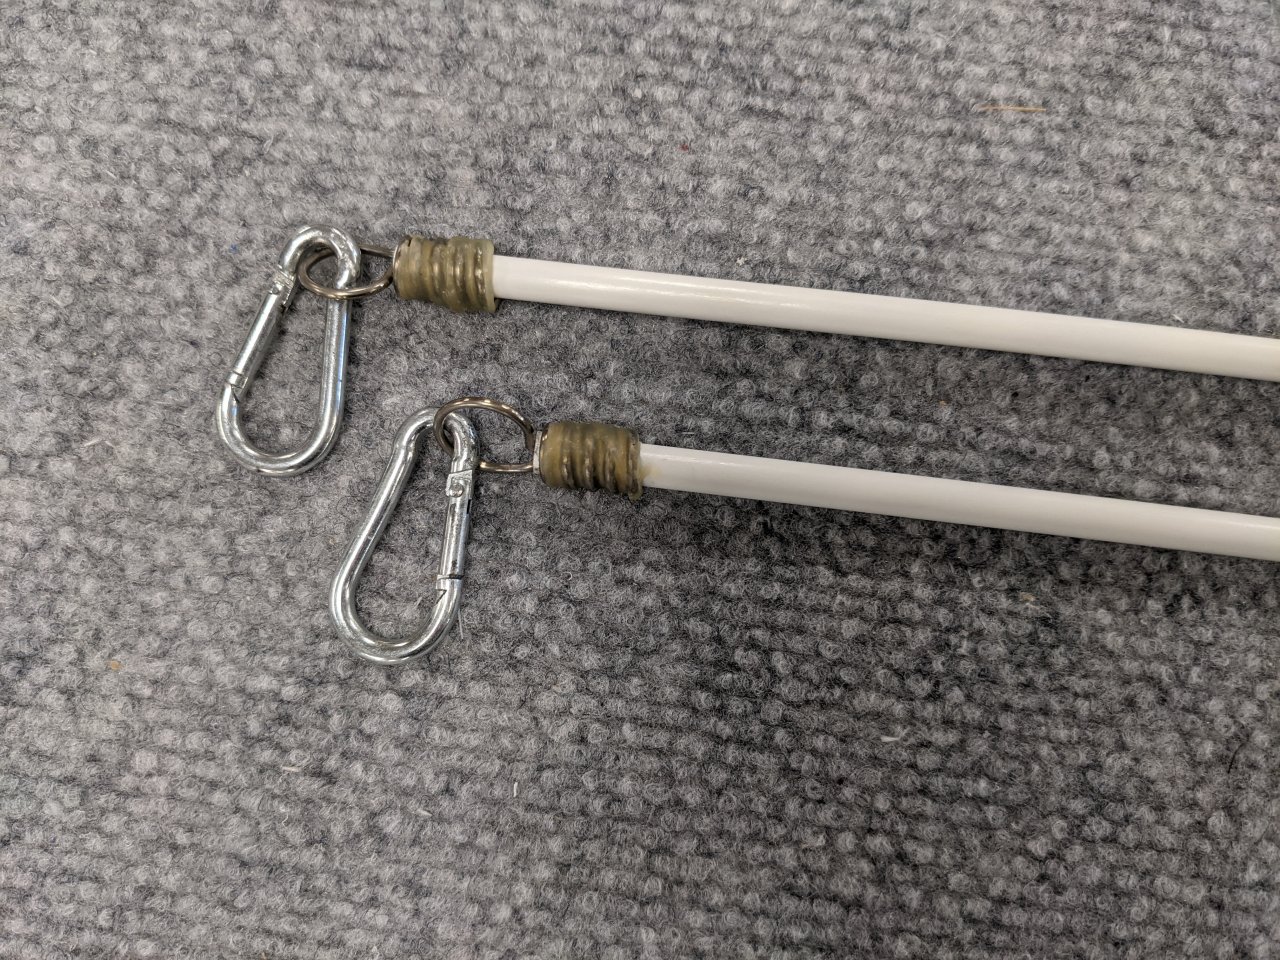
Pennant Instructions:
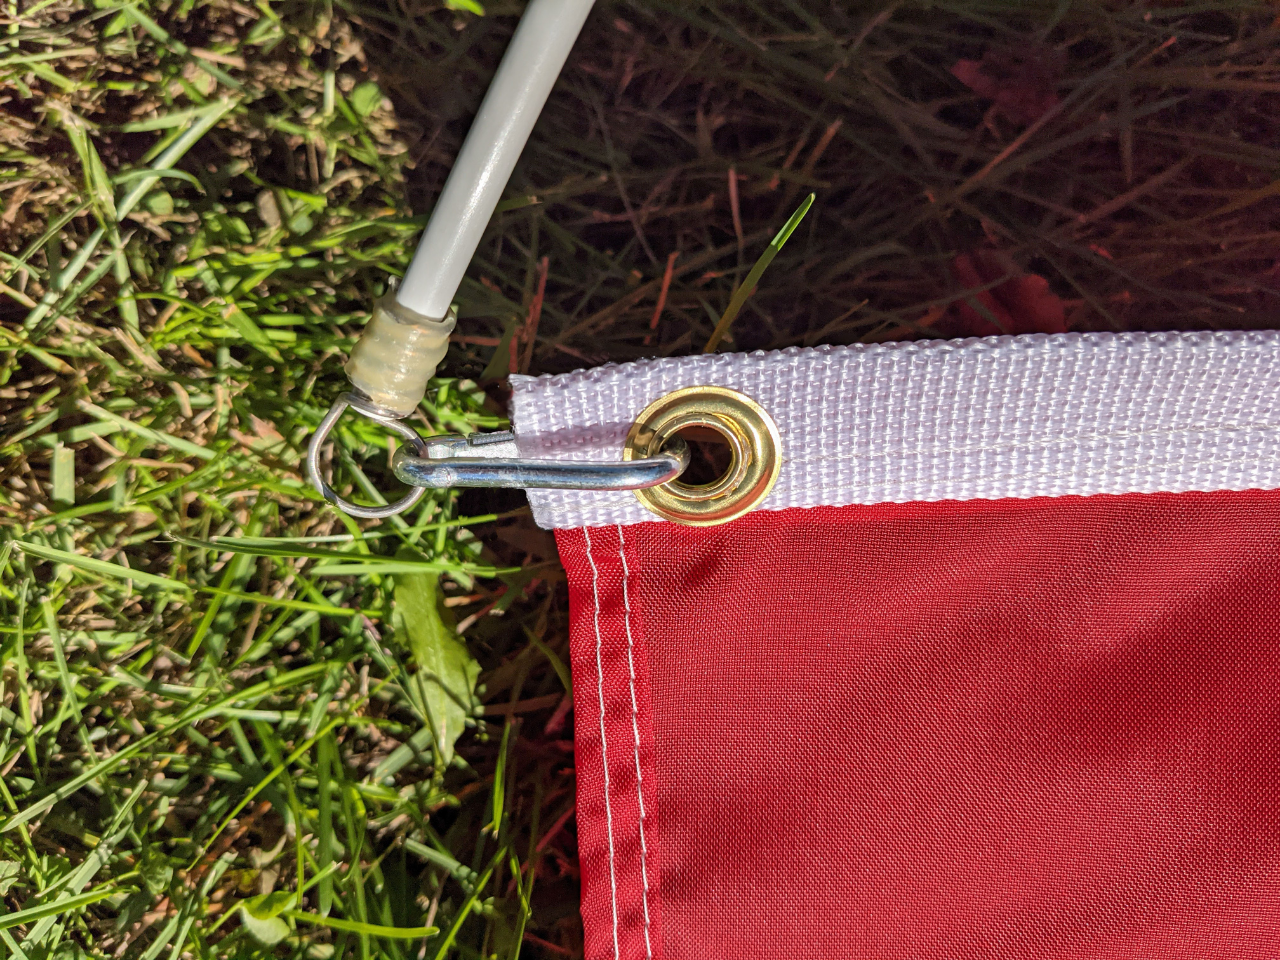
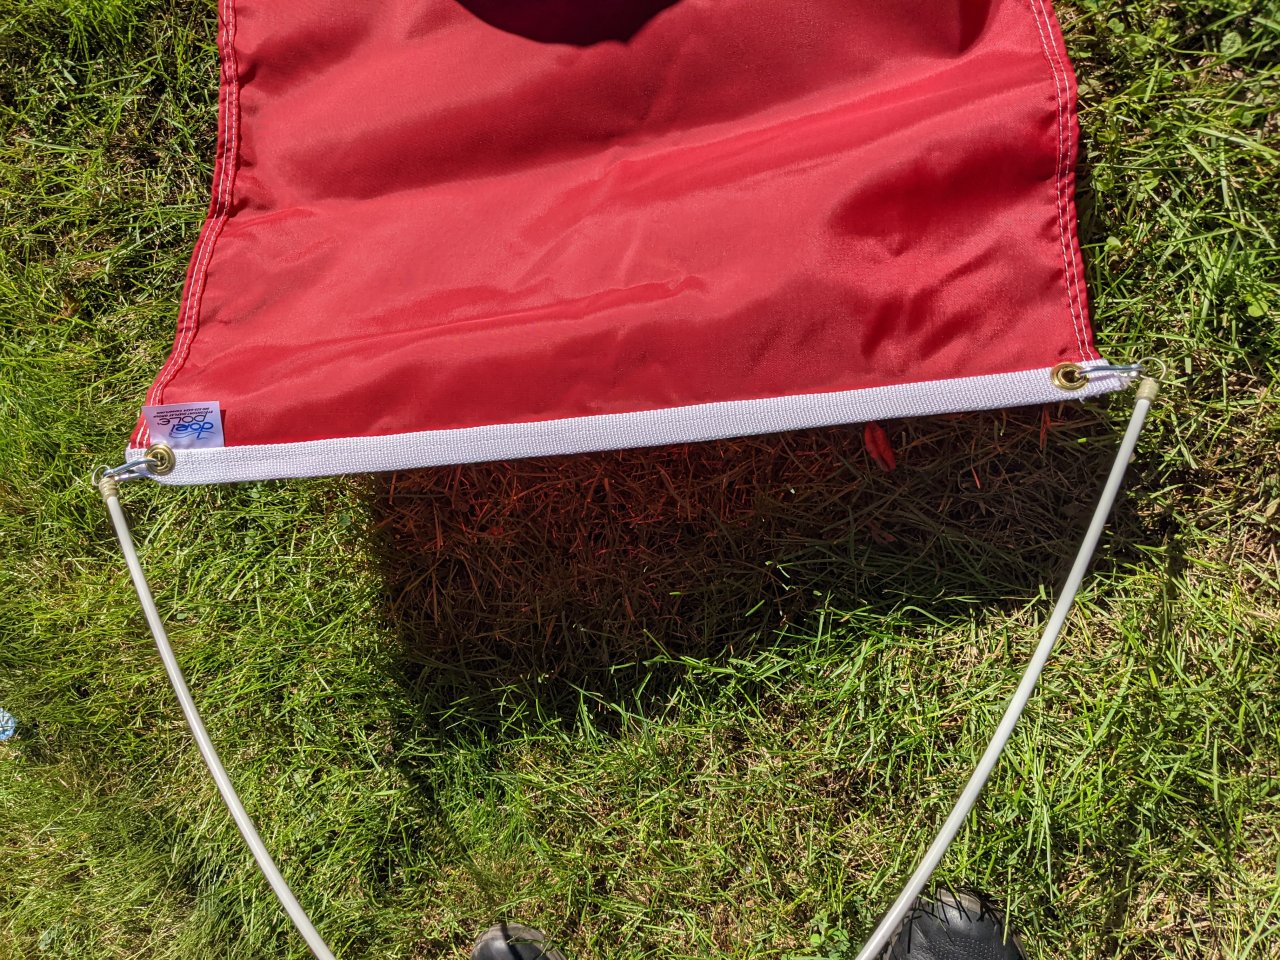
Affixing the springs to pennant and ¼” rods to yoke::
With the addition of our new Carabiner Clips and Ring Top Arms, we have made the installation of the Dori Pole Pennants onto the Swiveling Yoke easier.
Here’s the “how-to”:
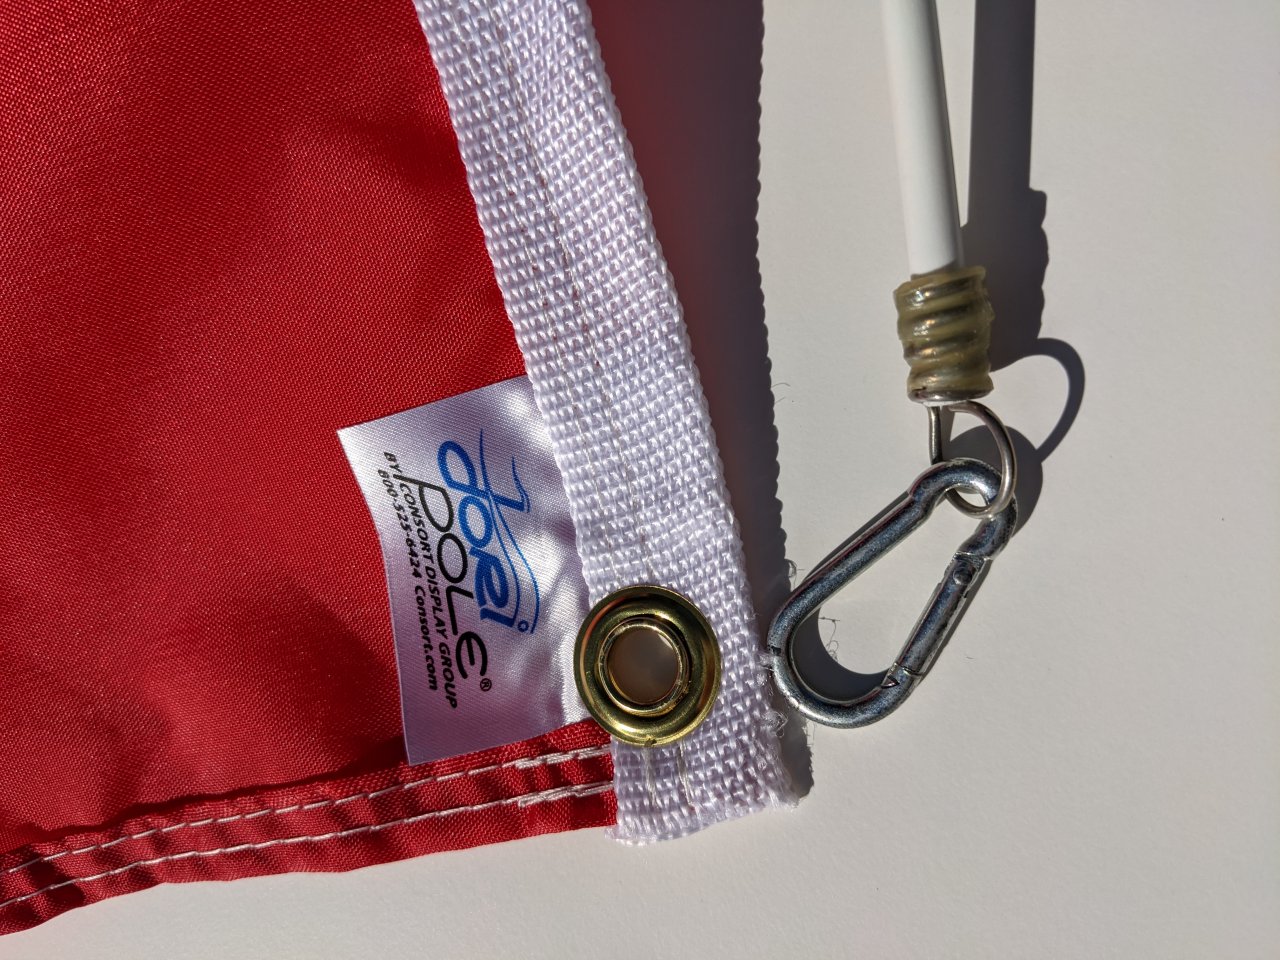
Attach one fiberglass Ring Top Arm with carabiner to one of the two pennant grommets (your pennant may have arrived with the carabiners already attached). Next, attach the other carabiner to the other grommet (keeping that carabiner unattached from the Ring Top Arm. Then, put both arms into the Yoke and bend the un-attached Arm toward the pennant and snap the carabiner onto the Ring Top.

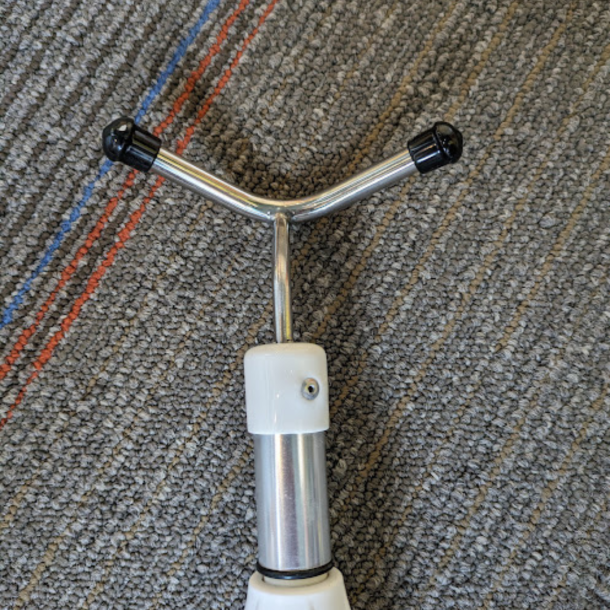
*If you are having issues installing your Dori Pole Pennant arms into the swiveling yoke, make sure that you have removed the plastic plugs installed to keep poles safe during shipping. (see image below for reference)
Dori Pole Lake Dock Mounting Options:

Option A – Dori Pole Dock Mount Kit
This Kit makes mounting a Dori Pole to your dock or other similar surface a snap. The Dock Mount Kit is recommended for use with the 13.5′ Mid-Rise and the 19′ Three-Piece telescoping Dori Poles (It also fits the 22’ Dori Pole that is not offered online but can be sourced through your sales representative). The Kit includes two 2.75” long x 5/16” stainless steel horizontal bolts, washers and two stainless lock nuts to mount to standard aluminum dock stringers or to standard “2X” wood stringers.
The black disc shown next to the Mount slides into the 2” aluminum pipe after it is installed. This disk protects the base of the fiberglass Dori Pole from the ¼” “through-bolt” pole stop. This Kit is an extremely durable, heavy duty product that will literally never wear out!
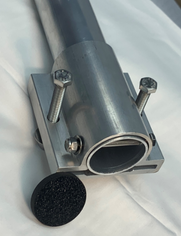
- Durable 24″ long x 2″ O.D. aluminum pipe and heavy-duty aluminum mounting bracket & bolts
- All metal components are aluminum and stainless steel
- Includes the Dock Pole Bushing
- Made in Michigan*
O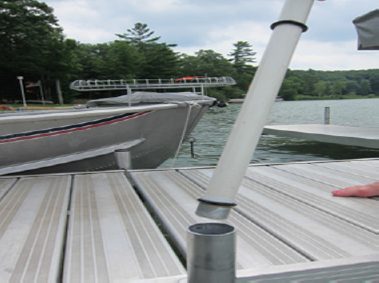 ption B – If you have dock posts into which a Dori Pole will fit
If your post has an interior diameter of 1-7/16” or more you can slip the Dori Pole into the post. We recommend that the Dori Pole go down into the post at least 18” and we suggest that a hole be drilled at that 18” mark through the post and a horizontal bolt be placed through the post for the Dori Pole to rest on. Or, instead of the horizontal bolt you can put a filler of some sort, such as a broom handle, wood stick, plastic pipe, etc. to take up the space between the lake bottom and up to 18” from the top of the post.
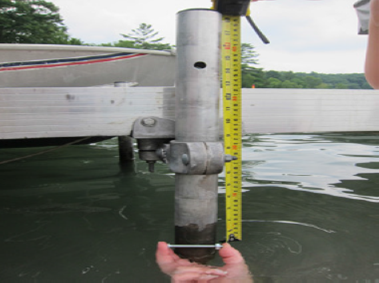 If there is more than 1/8” total “play” in the dock post after the Dori Pole is installed we suggest that two bushings, such as our DP O-Rings, be placed onto the Dori Pole as shown in the photos. You can also use several wraps of electrical tape and so on. Place the top O-Ring or the top wrap of tape very close to the top of the dock post so that the Dori Pole does not rub against the top of the dock post. If the Dori Pole is allowed to do so, it will wear and eventually damage the fiberglass.
 Option C – The Dori Pole Mount Bracket (if you do not have dock posts but want to mount to the side of your dock)
If you don’t have dock posts, we manufacture a bracket that will accept a 2″ O.D. U-bolt (from your hardware store) that is a perfect way to mount a 2″ O.D. aluminum dock post (tube) next to your dock. This would be a post that you would source from a marine or hardware store that might be 4 feet to 8 feet tall depending on how deep your lake is at the point of installation, as illustrated in the photos. You would simply measure from where you want the top of the pipe down to the lake bottom and purchase that length of pipe along with either an “auger” screw bottom or a flat plate bottom – both of which are available in case aluminum or injected plastic. This bracket, with your U-bolt, would hold all of that securely next to your dock and your Dori Pole would slide down into the top of that. See Option A abov

e, to learn about the horizontal bolt you would need to put about 18″ down, as well as the O-Rings or other buffer.
Here are the items you need to mount an aluminum post next to your dock:
Available from Dori Pole by Consort
1 – Dori Pole Dock Mounting Bracket
Sourced from your local marine or hardware store
1 – 2″ O.D. aluminum dock post – length needed determined by your lake depth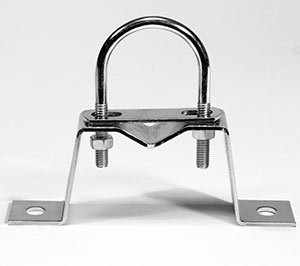
1 – 2″ U-Bolt
1 – Auger or bottom plate for the 2″ post
1 – 2.5″ bolt (1/4 x 20), 2 washers and one nylon insert locknut
Other Mounting Ideas On or Near the Dock:
 There are many ways to secure a Dori Pole for display. If you have a boat lift you can secure the Dori Pole to an upright with worm-gear banding, available at any hardware store. You can also display it on the shoreline with one of our Ground Stakes. In this case, you may need to reposition it occasionally as shoreline ground tends to be softer causing the Dori Pole to lean a bit after a period of time. Or, for a more permanent ground mount use our Ground Sleeve and permanently sink it into a concrete foundation as shown on our instruction sheet. You can also mount your Dori Pole JR to floating rafts with our raft mount. It does a great job of keeping birds from taking over your raft!